Introduction to the Router Table
Woodworking is an art that requires precision, patience, and the right tools. Among the most versatile and powerful tools in any workshop is the router table. This stationary device transforms a handheld router into a precision shaping machine, allowing you to create flawless edges, intricate joinery, and decorative profiles with ease. However, like any powerful tool, it demands respect and understanding. Many beginners find the router table intimidating, but once you grasp the fundamentals, it becomes an indispensable ally in your workshop. This article will guide you through every aspect of this tool, treating each adjustment like the bands on a quad equalizer. By the end, you will have a clear understanding of how to use a router table safely and effectively, turning your workshop into a hub of creative possibility.
Understanding Your Router Table
The Basic Components of a Router Table
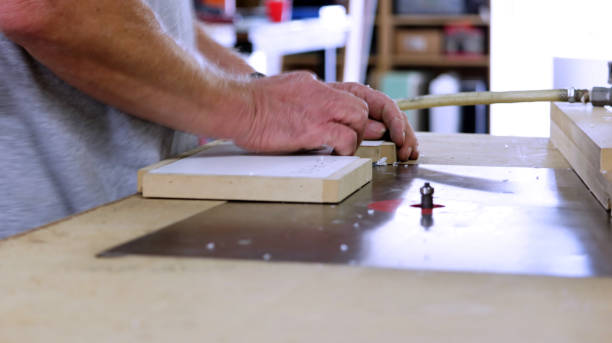
Before you can master how to use a router table, you need to understand its anatomy. A typical router table consists of a flat surface, usually made of cast iron or phenolic resin, with a hole in the center where the router bit protrudes. Beneath this table is a mounting plate that holds the router securely. The fence is a critical component that runs across the table, guiding your workpiece and controlling the depth of cut. Most router tables also include a mitre gauge slot for crosscuts and a starting pin for curved work.
Additionally, many modern router tables feature a lift mechanism that allows you to adjust the bit height from above the table. This is a significant convenience because it eliminates the need to reach underneath the table for every adjustment. Understanding these components is the first step in learning how to use a router table. Each part works in harmony to give you control over your woodworking projects, much like the bands of an equalizer work together to shape your audio.
Safety First: Protecting Yourself and Your Tools
Safety cannot be overstated when discussing how to use a router table. The router spins at incredibly high speeds, often exceeding twenty thousand revolutions per minute. At these speeds, even a small mistake can lead to serious injury. Always wear safety glasses to protect your eyes from flying debris. Hearing protection is also essential because the noise generated by a router can damage your hearing over time. Avoid wearing loose clothing or jewelry that could get caught in the spinning bit.
Before you start any project, inspect your router bit for damage. A dull or chipped bit is dangerous and will produce poor results. Ensure that the bit is securely tightened in the collet. Also, check that the fence is locked firmly in place and that the dust collection system is functioning properly. Dust and debris not only make a mess but can also obscure your view of the workpiece. Remember, learning how to use a router table begins with a commitment to safety. Never rush your setup, and always think twice before making a cut.
The Four Key Settings: Your Router Table Equalizer
Setting the Bit Height: The Low Band of Your Cut
Just like the Low band on a quad equalizer sets the foundation of your sound, the bit height sets the foundation of your cut. This adjustment determines how deep the router bit penetrates your workpiece. For edge profiling, you typically want the bearing of the bit to ride along the edge of the wood. For joinery like dadoes or rabbets, the bit height dictates the depth of the groove.
To set the bit height correctly, place your workpiece on the table next to the bit. Slowly raise the bit until it reaches the desired height. Most router tables have a height adjustment mechanism that allows for micro adjustments. A common technique is to use a scrap piece of wood to test the depth before committing to your final workpiece. Proper bit height is crucial in how to use a router table effectively because it directly impacts the quality and safety of your cut. A bit that is too high will remove too much material, causing tear out. A bit that is too low will not create the desired profile.
Adjusting the Fence: The Low Mid Band of Control
The fence is the heart of your router table setup, much like the Low Mid band is the heart of your audio mix. It controls the lateral position of the cut and determines how much of the bit is exposed to your workpiece. For edge work, the fence is typically flush with the bearing or the cutting edge. For slot cutting or joinery, the fence is adjusted to control the width of the cut.
When learning how to use a router table, you will find that fence adjustment is where most of your precision work happens. Many fences have split designs that allow you to offset the outfeed side slightly. This compensates for the material removed by the cut, ensuring that your workpiece stays flush against the fence throughout the operation. This is particularly important for jointing edges. Take your time with fence adjustments. A hairline difference can mean the difference between a perfect joint and a ruined workpiece.
Choosing the Right Router Bit: The High Mid Band of Shape
The router bit is your cutting tool, and it defines the shape of your finished product, just as the High Mid band defines the presence and clarity of your audio. There are hundreds of router bit profiles available, from straight bits for joinery to decorative bits for edge profiling. Choosing the right bit for your project is essential in mastering how to use a router table.
Straight bits are the most common and are used for cutting grooves, dadoes, and rabbets. Flush trim bits have a bearing that follows a template, making them perfect for duplicating shapes. Roundover bits create a smooth, rounded edge, while chamfer bits produce a beveled edge. More decorative bits like ogee or roman ogee add classical detailing to furniture. When selecting a bit, consider the hardness of your wood and the speed of your router. Carbide tipped bits are generally recommended for their durability. Always use sharp bits because dull bits require more force and produce burn marks on your wood. The bit you choose directly influences the complexity and beauty of your work.
Feed Direction and Speed: The High Band of Execution
The final setting in your router table workflow is feed direction and speed, akin to the High band that adds the finishing sparkle to your audio. Feed direction refers to the direction you push your workpiece across the table. The golden rule of router table operation is to feed the work from right to left, against the rotation of the bit. This is called conventional feed, and it keeps the bit pulling the work into the fence rather than trying to push it away.
If you feed the work in the wrong direction, the bit will grab the wood and throw it across the room, a dangerous condition known as climb cutting. While climb cutting has its uses, it should only be attempted by experienced woodworkers. In addition to direction, feed speed is critical. Push the work too fast and you will get a rough, chattering cut. Push too slowly and the bit will burn the wood. The ideal feed speed produces smooth, continuous shavings without bogging down the router motor. Learning the proper feed technique is a core part of how to use a router table effectively and safely.
Advanced Techniques for the Router Table
Using Templates and Jigs
Once you have mastered the basic settings, you can expand your capabilities by using templates and jigs. A template is a pattern that your router bit follows to produce identical parts. This is invaluable for creating multiple pieces of furniture or for intricate inlay work. To use a template, you attach the template to your workpiece and use a flush trim bit with a bearing. The bearing rides along the template, and the cutting edge trims your workpiece to match the template exactly.
Building jigs for your router table is a rewarding aspect of woodworking. A tenoning jig helps you cut accurate tenons for mortise and tenon joints. A box joint jig allows you to create interlocking finger joints for drawers and boxes. These jigs extend the functionality of your router table far beyond simple edge profiling. They represent the advanced level of how to use a router table, turning your workshop into a production facility for complex joinery.
Dust Collection and Maintenance
A router table generates a significant amount of dust and debris. This dust is not just a nuisance; it is a health hazard and can obscure your vision during critical cuts. Most router tables have a dust collection port underneath the table. Connect this to a shop vacuum or a dust extraction system to keep your work area clean. Additionally, many fences have built in dust collection attachments that capture dust at the source.
Regular maintenance of your router table is also essential. Keep the table surface clean and waxed to ensure smooth feeding of your workpieces. Lubricate the height adjustment mechanism periodically. Check the collet for wear and replace it if you notice any slipping. A well maintained router table is safer and produces better results. As with any tool, the time you invest in maintenance pays dividends in performance and longevity.
Conclusion: Achieving Mastery in Your Workshop
Mastering the router table is a journey, not a destination. Each project you complete will teach you something new about this versatile tool. The four key settings, bit height, fence adjustment, bit selection, and feed control, are your equalizer for tuning your woodworking. They give you the power to shape wood with precision and creativity. By understanding these elements and practicing safe techniques, you will unlock the full potential of your router table.
Remember that patience is your greatest ally. Do not rush your setups. Always test your cuts on scrap wood before working on your final piece. Listen to your router; it will tell you if you are feeding too fast or if the bit is dull. Woodworking is a craft that rewards attention to detail. The more you practice how to use a router table, the more intuitive these adjustments will become.
Whether you are a beginner making your first picture frame or an experienced craftsman building a dining table, the router table is a tool that will serve you well. It allows you to create joints that are strong and beautiful, edges that are smooth and inviting, and shapes that are unique and expressive. So, step into your workshop with confidence. Tune your settings like a master sound engineer tuning a quad equalizer. Make your cuts with purpose and care. Your woodworking will reach new levels of quality and satisfaction. The world of woodworking is vast and rewarding, and with your router table, you have the power to create anything you can imagine. Embrace the learning process, stay safe, and enjoy every moment of your craft.